Lightroom clipping is a crucial concept in photo editing, particularly in Adobe Lightroom Mod. It refers to the phenomenon where certain areas in a photograph lose detail, appearing as either completely white or completely black. Understanding and managing clipping is essential for photographers who aim to produce images with balanced exposure and rich details. If you want to download the latest version of Lr Mod APK then click this link now

The Basics of Clipping in Lightroom
Clipping in Lightroom occurs when the intensity levels in an image exceed the maximum or minimum range that can be displayed or printed. This results in a loss of detail in specific areas:
- Highlight Clipping: An image that is so bright that all the details are not visible appears as pure white
- Shadow Clipping: An image that is too dark, with no visible details, appearing pure black.
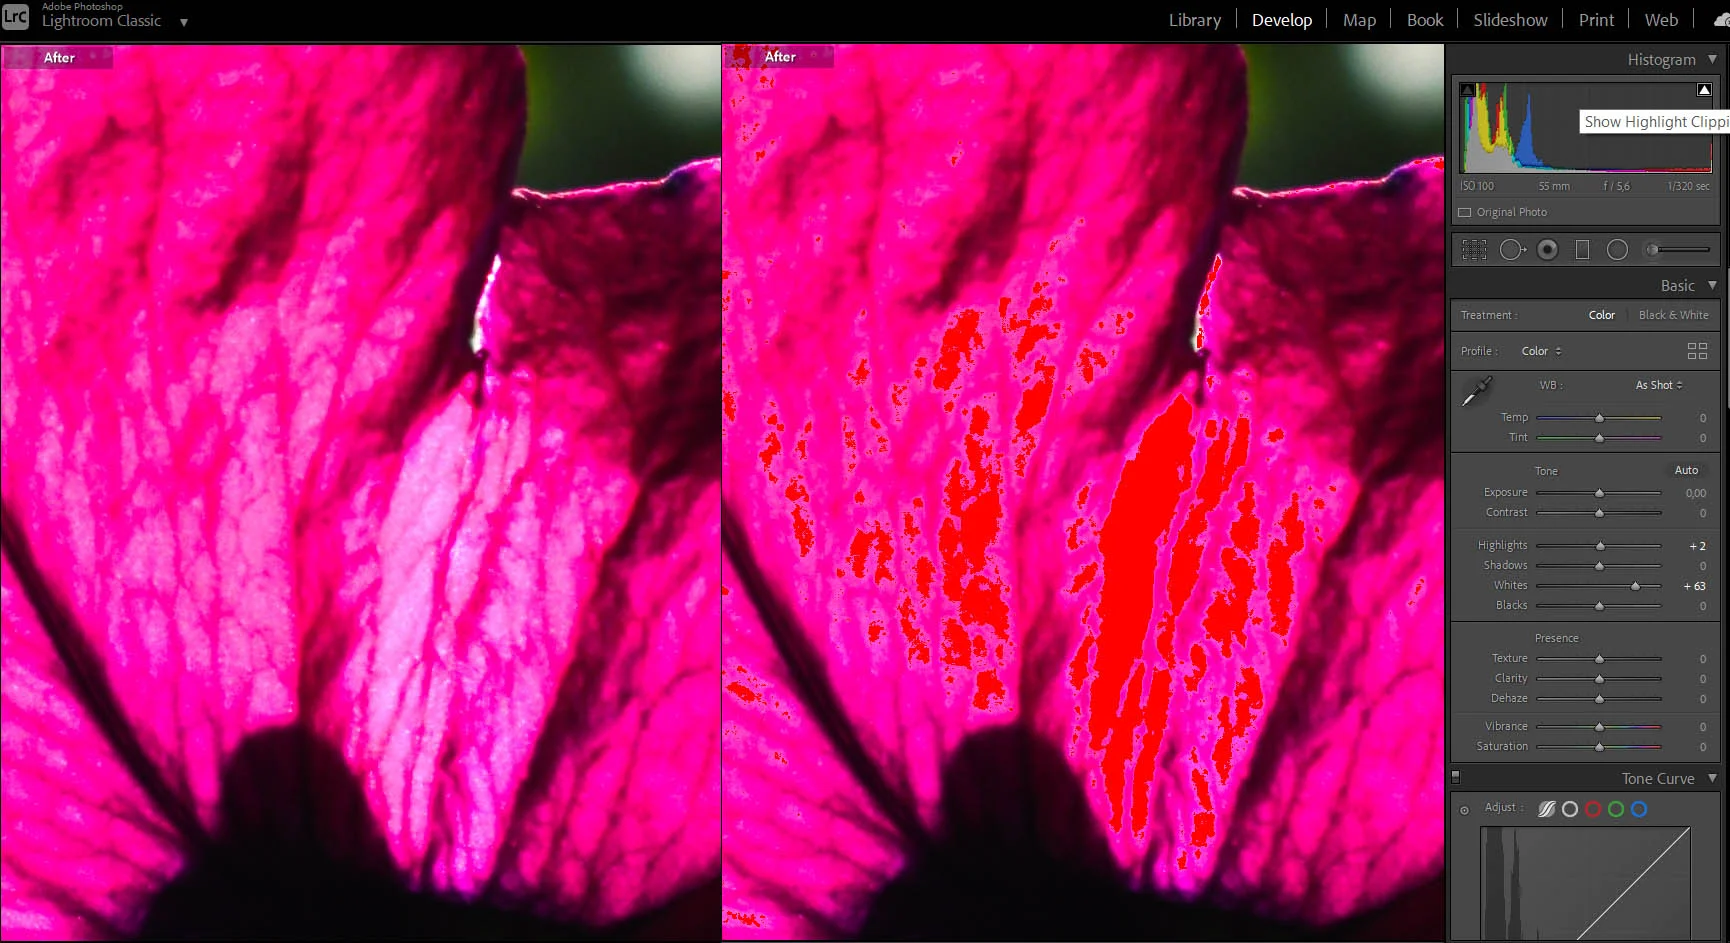
Lightroom uses red and blue overlays to indicate these clipped images. The red overlay shows highlight clipping, while the blue overlay indicates shadow clipping. These visual cues are instrumental in identifying and correcting exposure issues in your images. For a deeper understanding of these concepts.
How to Fix Clipping in Lightroom
To fix clipping in Lightroom, you can adjust various sliders in the Develop module:
Reducing Highlight Clipping:
Lower the Highlights and White sliders. Adjust the Exposure slider if necessary.
Reducing Shadow Clipping:
Increase the Shadows and Blacks sliders. Adjust the Exposure slider for overall brightness.

When dealing with skin tones, be cautious with the white slider to avoid unnatural skin textures. Balancing these adjustments is key to retaining natural-looking images.
To remove clipped areas from your image, you adjust the sliders in the basic panel. If the highlights are clipped (red areas), then you would adjust the highlights and/or the white sliders. The exposure slider can also be adjusted to remove highlight clipping.
Turning the Clipping feature On and Off in Lightroom
Toggling the clipping feature in Lightroom is straightforward:
- To Turn Clipping On/Off: Press the ‘J’ key. This action toggles the clipping overlays in your image.
- Understanding Histogram Triangles: The triangles in the histogram’s corners indicate clipping. A white box around the triangle means clipping is on for that tonal range (highlights or shadows).

Colorful Clipping Indicators in Lightroom
In Lightroom, the histogram’s triangles aren’t just decorative; they serve as colorful clipping indicators. These triangles change color based on which color channel is experiencing clipping:
Blue Triangle:
Indicates clipping in the blue channel.
Red Triangle:
This signifies clipping in the red channel.

These colored indicators are more than just warnings; they provide a nuanced view of how different color channels are affected by exposure levels. This insight is invaluable for fine-tuning image adjustments, especially in color-critical work. Understanding these nuances can significantly enhance your photo editing skills.
Practical Applications and Examples
Clipping isn’t always negative; in some scenarios, it can be beneficial:
- Beneficial Clipping: In high-key photography, some highlight clipping can add to the aesthetic, creating a bright, airy feel.
- Detrimental Clipping: In landscape photography, losing details in shadows or highlights can detract from the image’s depth and realism.
Analyzing images with and without clipping helps understand their impact. For instance, a portrait with clipped highlights might lose detail in key areas like the eyes, while a deliberately overexposed fashion shot might benefit from the stark contrast. Have Camera Will Travel provides excellent examples of these scenarios.
Conclusion
Understanding Lightroom clipping is essential for any photographer looking to enhance their photo editing skills. It’s not just about correcting mistakes but also about making informed artistic choices. Here are some final tips:
- Always monitor your histogram during editing.
- Use clipping indicators as a guide, not an absolute rule.
- Practice makes perfect – experiment with different settings to see their effects.
FAQ’s
Is clipping bad in Lightroom?
When an area has no information, it is either pure white or pure black. Photographers often refer to these as “blown out” areas. Having large areas of your image with highlight or shadow clipping is generally undesirable. Luckily, this can be corrected in Lightroom quite easily!
What are clipping indicators in Lightroom?
In technical terms, clipping occurs when Lightroom detects a lack of digital information in a portion of your image, meaning those areas that show up with the red or blue overlay have no visual detail. When displayed either on the web or in print, those areas will appear pure white or pure black.
What is the clipping effect?
The Clipping effect can also be called a mask effect. This effect allows you to cut and hide part of your animation. For example, if your background is a picture of the seabed with seaweed in front, you may want your animation to pass between the seaweed and the rest of the images instead of passing in front.
Why is clipping used?
In graphic design, clipping is a technique used to remove unwanted parts of an image, leaving only the desired section. This process is often done using software tools like Photoshop or Illustrator.